
Creating a Superuser in Django

Now that we have successfully completed the installation Phase, let's dive right into building our app. If you have not installed Django already you can check here on how to install Django and get started in creating your app. In this article I will be walking us through How to create Superuser in Django.
Starting an app in django, we will be doing a lot from the admin area, for this reason we need to set up our admin area. The admin is an individual who can access the backend of the app, to create, edit or delete anything.
To create super user: We will go back to our code when we have installed django successfully. Then we'll go to our terminal control and type winpty python manage.py createsuperuser.
winpty python manage.py createsuperuser
Note that: winpty is used because I'm on gitbash terminal. if you are using mac/linux/command prompt(CMD) you will use just python manage.py createsuperuser.
python manage.py createsuperuser
When this is done. Django will allow us to input our preferred: Username Email address Password Password again Note: The password will be invisible don't worry type it and type the password again for verification. It's important to type the same password again.
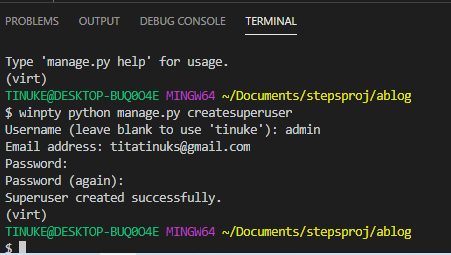
When this is successful. We need to run our server again before proceeding to our browser.
python manage.py runserver
Now we can head back to our browser and add "/admin" to our localhost.
http://127.0.0.1:8000/admin/
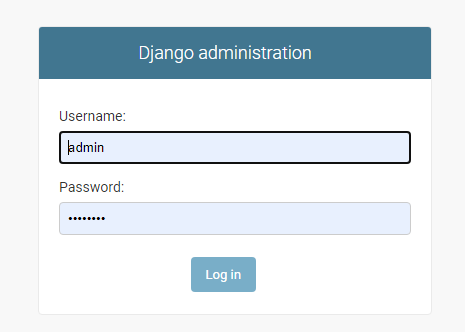 The username and password we created initially is the same username and password needed to login to the admin page. In my case my username is admin.
Note: it can be left blank and django will use your PC name as a default username, mine would be "tinuke".
The username and password we created initially is the same username and password needed to login to the admin page. In my case my username is admin.
Note: it can be left blank and django will use your PC name as a default username, mine would be "tinuke".
When we are logged in we'll get this
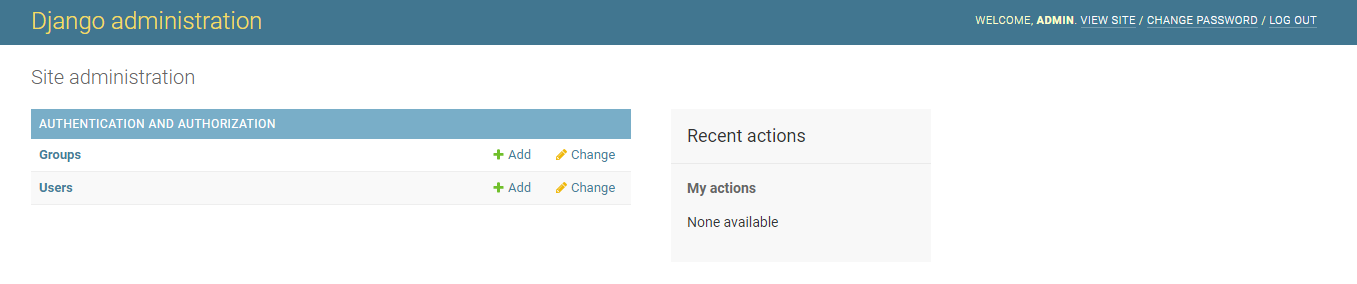
This is Django Administration page where the admin can perform some specific actions which a regular user can not do.
When we click on the "user" we will land to this.
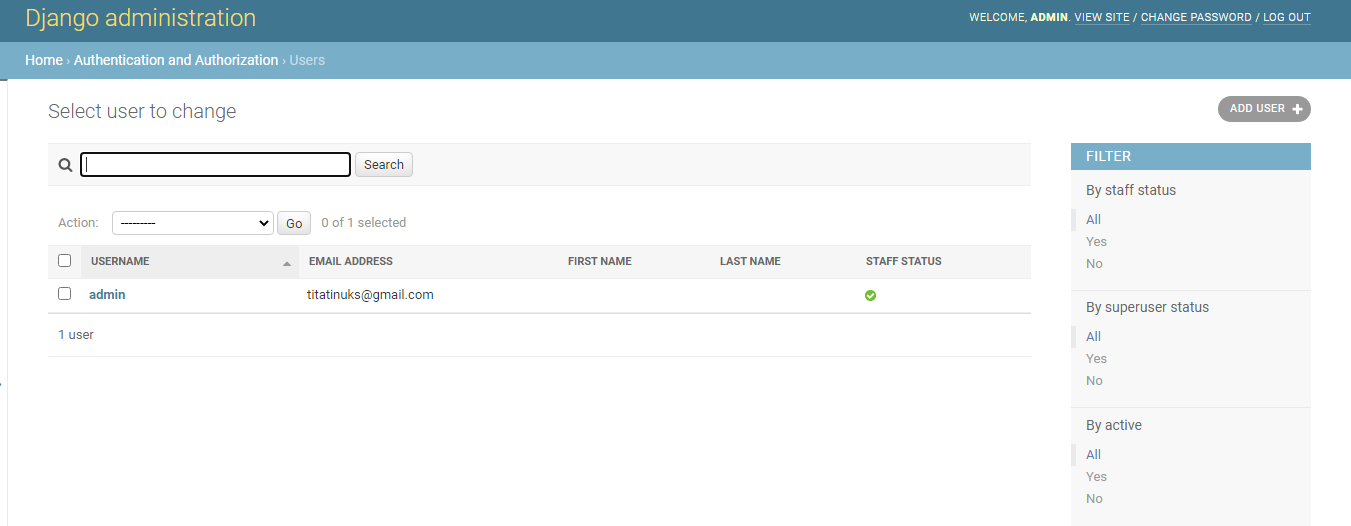
We can then click on admin(We are seeing admin because I used admin as my username while creating my superuser, you can have otherwise) We can update our user(admin) by adding first name and last name. Our Email is already there because we added our Email while creating our superuser.
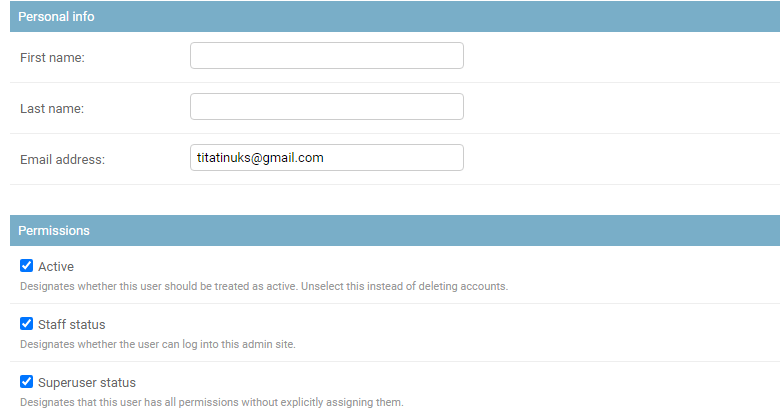
We can then save and Hurry our Superuser is created. I hope you get the whole steps of create a superuser. I hope you've successfully created your own superuser too and we can enjoy the ride together. Thanks for reading till the end. Please feel free to drop your questions or comments in the comment box below.
Reference
About the author
I am a self-taught developer with a lot community support!
Now exploring Community Management🤗🤗
Comments
Join the discussionNo comments yet. Be the first to comment.


