In my previous article, I wrote about creating a Superuser in Django, If you haven't created your superuser, you can check it out here.
Each application written in Django comes with a utility that automatically generates the basic directory structure of an app, so you can pay attention on writing code rather than creating directories.
In Django, the role of a project differs from the role of an app. According to Django Documentation
An app is a Web application that does something – e.g., a Weblog system, a database of public records or a small poll app. A project is a collection of configuration and apps for a particular website. A project can contain multiple apps. An app can be in multiple projects.
In this article I will be walking you through:
How to create an App
The role of all in-built file in an App
How to create an App
There are certain steps to follow when we want to create an app. They are:
Step one: Let's go to our Terminal
Go to your command prompt(CMD) or any terminal you are using and make sure you are in the project folder you created. Like this:
dir
We dir for the list of directories we have on our Personal Computer(PC)
cd Documents
Note: I cd into Documents because when I created the Django project I created it in my Document, yours can be anywhere else. Eg Desktop, Downloads etc.
cd stepsproj
Note: I cd into stepsproj because I named my project folder stepsproj. Like I said yours can be different, you can cd to what you named your project folder.
If you are confuse about the project directory or how to create a project, check here.
Step two: Activate your virtual Environment
You will Activate your virtual environment like this:
if you are on bash command terminal: source virt/Scripts/activate. If you are on CMD virt\Scripts\activate.
source virt/Scripts/activate
virt\Scripts\activate
If you are on Mac or Linux is virtual environment name/bin/activate
virt/bin/activate
Step three: cd into your project directory
To create an app you have to be the project directory. Remember when I created my Django project and a named it ablog yours might be different too.
cd ablog
According to Django Documentation.
Your apps can live anywhere on your Python path. In this case, you’ll create your app in the same directory as your manage.py file so that it can be imported as its own top-level module, rather than a submodule of ablog.
Step four: Create App
To create your app, make sure you’re in the same directory as manage.py. Then type this command:
Window/Linux/Mac
python manage.py startapp "name of app", in my own case "news".
python manage.py startapp news
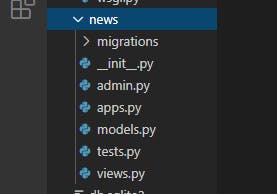
Hurray! Your app is successfully created. How do I know this? Go to your Virtual Studio Code (PS: I use VS code as the IDE for this project) and boom! This will appear.
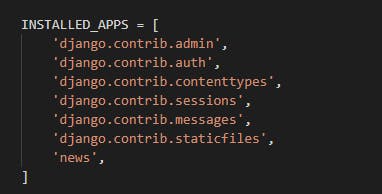
After the app has been created, you will need to add your app name in your settings.py file under the INSTALLED_APPS section like this:
Next is you add the URL path for your app in the urls.py file on ablog (project name) directory. The main purpose of doing this is to be able to control your app with that path easily. You can add URL path like this:
from django.contrib import admin
from django.urls import path, include

urlpatterns = [
    path('admin/', admin.site.urls),
    path('', include('news.urls')),
]
The role of all in-built file in an App
The role of each in-built file differs from the other. However, all work together to keep the app running, hence when there is error in one of the file, the app will not run. So lets pick it one after the other, shall we?
- init.py: init.py file tells Python that this app is Python Package and should be treated as such. Remember the Python we installed and added to path right? If you miss that you can check it out here.
- admin.py: This is the file where all models created are saved. When a new model is created ensure you save to admin.py. This is like a setting that connect to the admin area. You'll get to understand this concept better when we start building our app.
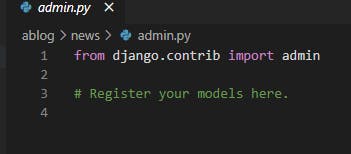
- apps.py: This is where your app is configured
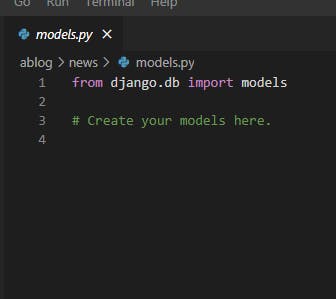
- models.py: This is the file where you create your models.
A model is the single, definitive source of information about your data. It contains the essential fields and behaviors of the data you’re storing.
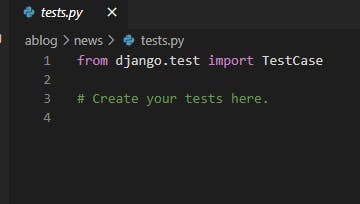
- tests.py: This is a file used to test the app.
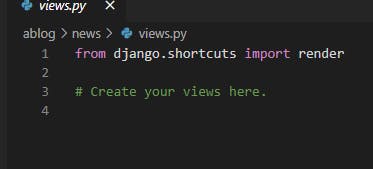
- views.py: This file contains the functions and classes that manage what will the displayed on the html template(what users will see).
Note: urls.py is not among the in-built files in the app we created. That will be done manually. Which I will be writing about in my next article while creating first template in Django.
Yuppie! we have created our first app successfully. I hope your app is successfully created too and we can enjoy the ride together. Thanks for reading till the end. Please feel free to drop your questions or comments in the comment box below.
Reference

